Installing and Setting Up Bloggingpro
Video Tutorial
Before installing Bloggingpro, please watch the following video to the end.
Installation Steps
- Download the theme file from the member area.
- Extract the package you downloaded, then upload bloggingpro.zip via Appearance > Themes > Upload Theme.
- Activate the Bloggingpro theme.
- Install and activate the recommended/required plugins.
License Activation
- Go to Plugins > Bloggingpro License.
- Enter the license key obtained from the Kentooz member area. Visit https://member.kentooz.com/softsale/license to get your license key after logging in.
- Save, and make sure the status is active so the theme functions properly.
Import Demo
- Go to Appearance > Import Demo Data.
- Click Import Demo Data, install required plugins, and wait until it completes.
- The layout will follow the demo; continue by adjusting menus, widgets, and Customizer settings.
Customizer
Open Appearance > Customize for all appearance settings. Example Customizer settings:
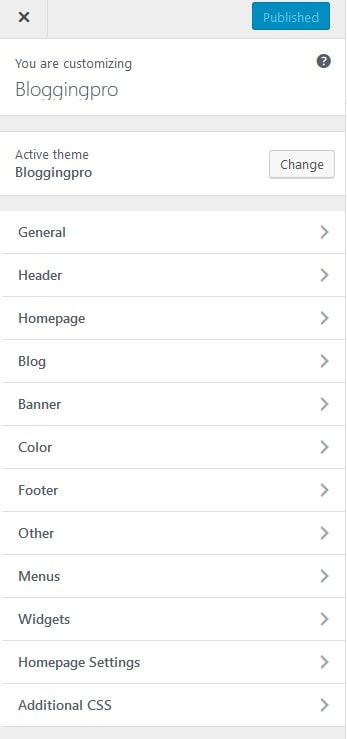
Key Customizer options:
- General: fullwidth/boxed layout, background image, typography.
- Header: logo, header image, menu style, menu colors, sticky.
- Homepage: home modules and headline carousel.
- Blog: layout & content (sticky sidebar, related posts, Facebook comments, etc.).
- Banner: manage all banner/ad slots.
- Color: general, header, menu, footer.
- Footer: copyright, number of widgets.
- Other: head/footer scripts, analytics, pixel, optimization.
- Menus and Widgets: manage navigation & widget areas.
- Additional CSS: add custom CSS if needed.
Server Requirements
Ensure your hosting server meets the following for optimal performance:
- Apache + PHP 7.4+ (latest version recommended).
- WordPress 5+ (latest version recommended).
- Curl Module and OpenSSL enabled.
The server requirements above follow WordPress recommendations. If you are using PHP below version 7.4, it’s best to update to 7.4+ due to security issues in older PHP versions.