Using Elementor in the Salespro Theme
A key feature of Salespro is full support for Elementor as a page builder, allowing you to create landing pages with drag & drop.
Video Tutorial
The original documentation includes a video on using Elementor in Salespro.
You can replace the video ID below with your own channel’s.
1. Initial Elementor Settings
Before building pages with Elementor:
- Go to Elementor → Settings.
- Under the General tab:
- Ensure the Post Types you want to edit with Elementor are checked (e.g., Pages).
- In Style or Advanced (depending on your Elementor version):
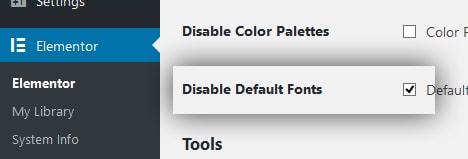
- Check Disable Default Fonts.
- (Optional) Check Disable Default Colors.
This lets Salespro control default fonts and colors instead of Elementor. Screenshot:
2. Create a Builder Page
- Go to Pages → Add New.
- Enter a page title (e.g., “Landing Page”).
- In the Page Attributes or Template panel (in the editor):
- Change the template from Default Template to Builder (or a Salespro‑specific template if available).
- Some additional theme settings may be available, such as:
- Disable the header
- Disable the footer
- Disable the section title
- Choose as needed. For full landing pages, header/footer are typically disabled.
- Click Publish.
Screenshot:

3. Edit the Page with Elementor
After publishing the page:
- Click Edit with Elementor at the top of the editor.
- Elementor opens the drag‑and‑drop interface.
- You can:
- Add new sections.
- Add widgets (Heading, Image, Button, Form, etc.).
- Configure padding, margin, background, and typography.
For complete Elementor documentation:
https://developers.elementor.com
4. Link Sections with the Menu (One Page)
If you want a menu that scrolls to specific sections:
- In Elementor:
- Select the target section.
- Under Advanced, set a CSS ID (e.g.,
features,pricing).
- In Appearance → Menus:
- Add a Custom Link.
- URL:
#features - Link Text: “Features”.
- Save the menu.
When visitors click the “Features” menu, the page scrolls to the section with the features ID.
5. Performance Tips
- Avoid too many heavy widgets (e.g., many animations) on a single page.
- Compress images before uploading.
- Use a cache plugin to improve loading speed.
If display issues occur:
- Ensure the page template is set to Builder.
- Try clearing caches (plugin and browser).